 how-to
How to Fix a Leaking Main Water Valve
Table of Contents
- Identifying Where Your Main Water Valve Is Leaking
- How to Turn Off Water to a House Before Repairs
- Repairing a Water Shutoff Valve Packing Nut Leak
- Replacing Packing or the Packing Washer
- Exercising the Valve Gently After Repair
- When to Replace the Valve Instead of Repair
- Main Water Shutoff Valve Replacement Cost and When to Call a Professional
- Common Mistakes to Avoid During Repair
- Frequently Asked Questions
Last Updated: October 21, 2026
Identifying Where Your Main Water Valve Is Leaking
A leaking main water valve is one of the most common plumbing emergencies homeowners face. The challenge isn't just stopping the leak, it's figuring out exactly where the water is coming from so you can make the right repair. At Colby Plumbing Company LLC, we've helped property owners diagnose and fix these leaks before they cause serious water damage.
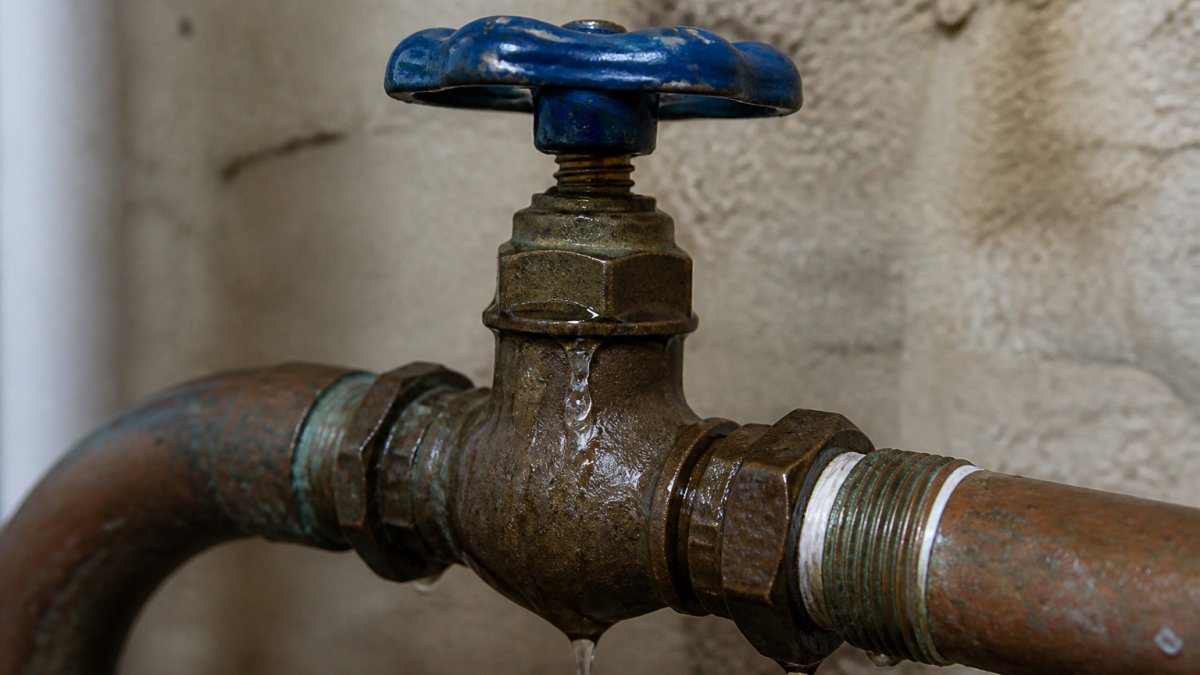
The location of the leak tells you what needs to be fixed. Water can escape from different parts of the valve, and each location requires a different solution.
Packing Nut Leaks vs. Valve Body Leaks
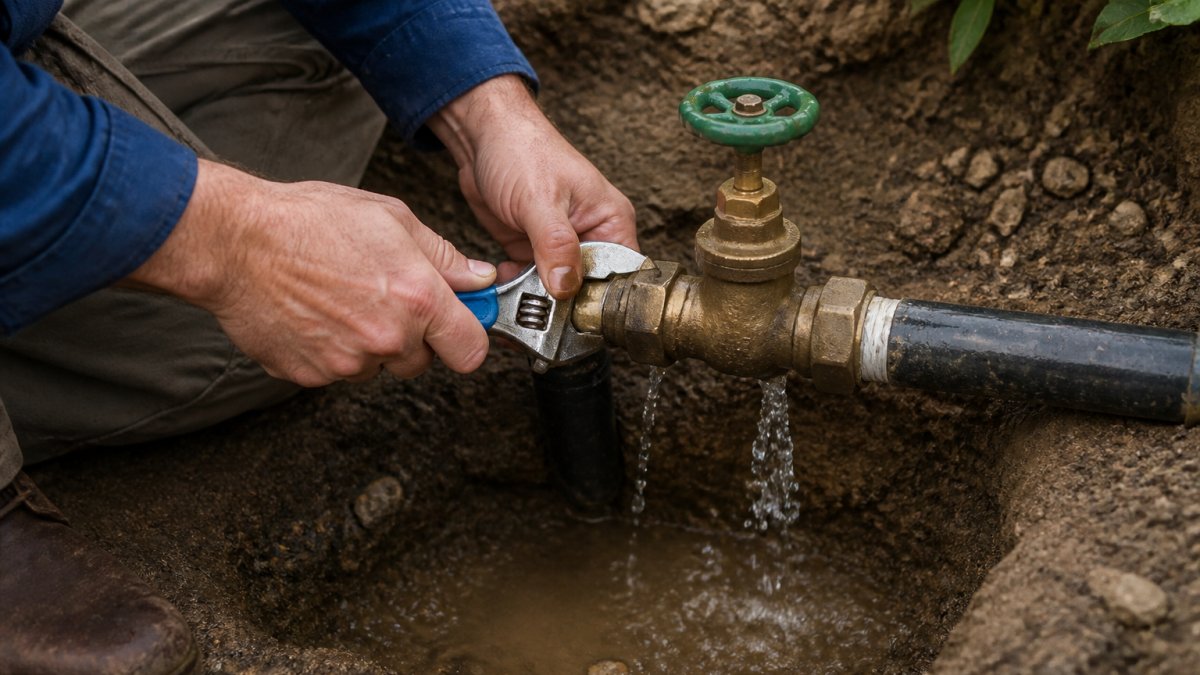
The packing nut is the hexagonal nut that sits where the valve handle connects to the valve stem. When this area leaks, water drips slowly near the handle. The valve body is the main part of the valve itself. When it leaks, water comes from the sides or bottom of the valve where the pipes connect.
Here's the key difference: packing nut leaks are usually fixable with simple tightening or packing replacement. Valve body leaks almost always mean the valve needs to be replaced.
A packing nut leak is your best-case scenario. Water typically drips in a steady pattern right at the handle, forming a small pool directly under where the handle meets the valve body.
Valve body leaks are more serious. Water seeps from the seams where the valve connects to the pipe, or from the bottom of the valve itself. The internal seal has failed and cannot be repaired.
Visual Cues for Pinpointing the Leak Source
Look closely at where the water is coming from. Dry the entire valve with a cloth, then watch for the first drops to reappear.
Packing nut leak signs:
- Water drips only from the area around the valve handle
- The leak stops when you turn the handle
- Drips are small and steady
Valve body leak signs:
- Water comes from the side seams of the valve
- Water pools at the base where pipes connect
- The leak continues even when the valve is fully open or closed
Run your hand along the valve body while it's dripping to feel where the water flows from. This simple touch test eliminates guesswork and saves time.
How to Turn Off Water to a House Before Repairs
Before any repair to the main water shutoff valve, you need to know how to stop water flow in case something goes wrong.
Most homes have a second shutoff point: a meter box in your front yard or along the street, containing a valve controlled by your water utility.
Locate your water meter and the utility shutoff valve now, before an emergency. Write down the location and take a photo on your phone.
Your main shutoff valve is typically located where the water line enters your home. Common locations include:
- In the basement near the foundation
- In a crawl space under the house
- In a utility room or garage
- Outside in a meter box
The valve handle is usually a lever or a wheel. A lever handle turns a quarter turn to shut off water. A wheel handle requires multiple full turns.
Turn the handle slowly and deliberately. Do not force it. If the valve hasn't been used in years, it may be stiff; apply steady pressure for several seconds.
Test this now by turning the valve slightly and checking that water stops at a faucet, then turn it back on.
Repairing a Water Shutoff Valve Packing Nut Leak
A packing nut leak is fixable without replacing the entire valve. The packing material inside wears out over time and loses its seal. Tightening the nut or replacing the packing can stop the leak.
This repair requires two wrenches and basic tools. The risk is low because you're working on the exterior of the valve, not its internal components.
Using Two Wrenches to Avoid Twisting the Pipe
This is the most important technique for this repair. When you tighten the packing nut, the valve body wants to spin with it, and if it rotates, the pipe connection can twist and crack. Two wrenches prevent this.
Place one wrench on the packing nut (the one you'll turn) and the second on the valve body just below it. Hold the valve body steady with the second wrench while you tighten with the first.
Both wrenches should grip firmly: one prevents rotation, the other applies tightening force. Turn the packing nut clockwise very slowly, making quarter-turn adjustments only.
Stop after each quarter turn and check for leaks. Do not over-tighten. The packing nut does not need to be cranked down hard. Gentle, steady pressure is all that's required.
Making Small Adjustments and Checking for Drips
After each quarter turn, wait 10 seconds and observe whether the drip rate slows down.
Small adjustments work better than large ones. After you tighten, turn on a faucet inside the house to restore water pressure and watch the packing nut area for drips.
If the leak continues, make another quarter turn. Most packing nut leaks stop after two or three quarter turns; if it persists after four, the packing material has failed and needs replacement.
The packing material is a soft cord wrapped around the valve stem. Over time it compresses and hardens; tightening pushes it tighter against the stem, but if it's too worn, tightening alone won't work.
Replacing Packing or the Packing Washer
If tightening the packing nut didn't stop the leak, the packing material needs replacing. This is still a simple repair that doesn't require a professional.
Turn off the water at the main shutoff valve. Drain the line by opening a faucet inside the house.
Inside the hole where the packing nut was, you'll see the worn packing material, usually a soft, dark cord or a flat washer.
Remove the old packing gently with a small screwdriver or pick, without scratching the valve stem, then clean the area with a dry cloth.
New packing material comes in a kit from any hardware store, with replacement cord or washers. Follow the package instructions; most packing wraps around the stem in layers.
Wrap the new packing around the valve stem two or three complete times without overlapping the layers.
Turn the water back on and check for leaks. The leak should stop completely.
Exercising the Valve Gently After Repair
After you've fixed the leak, the valve needs to be used carefully for the next week. This is called exercising the valve. It helps the new packing material settle properly.
Turn the valve handle fully open and fully closed once per day for seven days. Do this slowly and deliberately. Don't force the handle. The gentle movement helps distribute the packing material evenly and creates a better seal.
This step takes 30 seconds per day and makes a huge difference in how long your repair lasts. Many people skip this step and wonder why their leak comes back within a month. The packing needs to be worked in.
After seven days of gentle exercise, your repair is complete. The valve should operate smoothly and the leak should be gone.
When to Replace the Valve Instead of Repair
Not every leaking main water valve can be fixed with packing replacement. Sometimes the valve body itself is damaged and replacement is the only option.
Replace the valve if:
- The leak comes from the valve body seams, not the packing nut area
- Tightening and packing replacement didn't stop the leak
- The valve handle is stuck and won't turn
- The valve is more than 20 years old and leaking from multiple places
- You see corrosion or rust on the valve body itself
Valve body leaks mean the internal seal has failed. The seal is not replaceable, it's part of the valve casting. A new valve is the only solution.
Corrosion is a sign that the valve is reaching the end of its life. If you see rust or white mineral deposits on the outside, the inside is corroding too. Replace it before it fails completely.
A stuck valve that won't turn is a warning sign. The internal components are seizing. If you force a stuck valve, you risk breaking the pipe connection. Replace it with a new one.
Main Water Shutoff Valve Replacement Cost and When to Call a Professional
Replacing the main water shutoff valve is more complex than tightening the packing nut. It requires cutting the water line, removing the old valve, and installing a new one. This is where many homeowners decide to call a professional.
The cost of replacement depends on your valve type and pipe material. Ball valves (the most common modern type) are more expensive than older compression valves. Copper pipes are easier to work with than steel pipes.
Replacement requires time and effort. You'll need:
- Two adjustable wrenches
- A pipe cutter or hacksaw
- A new shutoff valve (quarter-turn ball valve recommended)
- Plumber's tape and joint compound
- A bucket to catch water
This is the point where many homeowners call Colby Plumbing Company LLC. Our licensed professionals can replace your main water shutoff valve quickly and correctly.
If you decide to replace the valve yourself, watch a video tutorial first. The process is straightforward, but mistakes can be costly. A leak at the connection point after replacement is not something you want to discover later.
Common Mistakes to Avoid During Repair
Most people make the same mistakes when repairing a leaking main water valve. Learning what to avoid saves time and prevents bigger problems.
Mistake 1: Forgetting to use two wrenches. One wrench on the packing nut and one on the valve body. This prevents the pipe from twisting.
Mistake 2: Over-tightening the packing nut. The nut doesn't need to be cranked down hard. Quarter-turn adjustments are correct.
Mistake 3: Skipping the exercise step. After you repair the leak, exercise the valve gently for one week.
Mistake 4: Not knowing where the utility shutoff valve is. If your main shutoff valve fails during repair, you need a backup.
Mistake 6: Forcing a stuck valve handle. If the handle won't turn, stop immediately. Forcing it can break the internal components or crack the pipe.
| Problem | Solution | Timeline |
|---|---|---|
| Water drips from packing nut | Tighten packing nut with two wrenches, quarter turns only | 15 minutes |
| Leak continues after tightening | Replace packing material | 30 minutes |
| Water seeps from valve body seams | Replace the entire valve | 1-2 hours |
| Handle is stuck and won't turn | Replace the valve | 1-2 hours |
| Leak comes back after repair | Valve body is damaged; replacement needed | 1-2 hours |
A leaking main water valve doesn't have to become a disaster.
Frequently Asked Questions
How do I tell whether a main water valve is leaking from the packing nut or the pipe connection?
Water dripping directly below the packing nut (the hexagonal fitting where the valve stem enters) indicates a packing nut leak. If water pools at the base where the valve connects to the pipe, the leak is from the valve body. Use a dry cloth to wipe the area and observe where moisture reappears. Packing nut leaks are typically the easiest to repair by tightening or replacing the packing.
Can you over-tighten a water shutoff valve?
Yes. Over-tightening the packing nut can crack the valve stem or strip the threads, making the problem worse. Tighten in quarter-turn increments, then check for leaks. Stop as soon as the drip stops. If tightening more than one full turn doesn't stop the leak, the packing or packing washer needs replacement rather than further tightening.
Should I turn off the water if the main shutoff valve is leaking?
Turn off the water only if the leak is severe or you cannot repair it quickly. For slow drips, you can proceed with repairs while water is on. However, if water is spraying or flowing, shut off the water at a secondary valve upstream if available, or at the meter. This prevents water damage while you work.
When should I call a professional plumber for a leaking main water valve?
Call a plumber if the valve body itself is cracked or corroded, if tightening and packing replacement don't stop the leak, or if the valve handle is stuck or broken. Valve replacement requires specialized tools and knowledge of local plumbing codes. Colby Plumbing Company LLC offers fast, reliable service for main water valve repairs and replacements, contact us today for a quote.