 How-to
What to Expect During Plumbing Installation
Last Updated: November 16, 2026
Quick Summary
Expect plumbing installation to begin with a walkthrough and written scope of work, followed by permits and inspections, rough-in with open walls, pressure and drain testing, then fixture installation and a final inspection. Most projects run from a few days to a few weeks depending on permit review, and water is shut off for several hours during fixture installation.
- A walkthrough covers existing pipes, water pressure, shutoff valves, and a written scope of work.
- Permits are commonly required for new fixtures, relocated lines, water heater replacement, and gas work.
- Rough-in typically takes 2-4 days with loud drilling, drywall dust, and open walls.
- The rough inspection must pass before walls close, and work stops until sign-off.
- Expect water shut off for several hours at a time during fixture installation.
Table of Contents
- The Walkthrough and Project Planning Stage
- Permits, Code Requirements, and Inspection Responsibilities
- Rough-In Plumbing: Pipe Routing and Layout Before the Walls Close
- Your Rough Plumbing Inspection Checklist
- How to Pressure Test New Plumbing
- How to Test Plumbing Drain Lines
- How to Leak Test Shower Plumbing
- A Realistic Day-by-Day Timeline and Disruption Guide
- Frequently Asked Questions
The Walkthrough and Project Planning Stage
Plumbing installation starts long before anyone cuts into a wall. It begins with a walkthrough, where a licensed plumber maps your existing system, measures the space, and flags anything that will slow the job down. The projects that go smoothly are usually the ones planned carefully up front.
So what should you expect during plumbing installation at this stage? A thorough inspection of your current pipes, water pressure, and shutoff valves, plus a written scope of work.
Here's what a good walkthrough covers:
- Where the main water line enters the home
- The condition of existing supply and drain lines
- Whether the water heater can handle new fixtures
- Wall, floor, and ceiling access points
- Any signs of past leaks or corrosion
This is also when you ask questions. A common mistake is waiting until demolition day to mention a fixture change. By then, the layout is set and changes cost more.
The output of this stage is a plan: pipe routes, fixture locations, material choices, and a schedule. Get it in writing.
Permits, Code Requirements, and Inspection Responsibilities
Plumbing work that adds, moves, or replaces pipes often requires a permit, and the permit triggers inspections. Skipping the permit can complicate a future home sale, so confirm permit requirements with your local authority before work begins.
Which work typically triggers a permit. The rules vary by jurisdiction, but a common pattern is that permits are required for new fixture installations, relocating supply or drain lines, replacing a water heater, and any gas line work.
Who does what.
- You: approve the scope, sign the permit application, provide access to the work area, and pay any permit fees (often rolled into the project price).
- Your plumber: pull the permit, schedule inspections, correct any failed items, and keep the inspection record.
- The inspector: verifies rough-in work before walls close, then verifies the final result after fixtures are installed.
How the inspection sequence shapes the schedule. A typical project includes a rough-in inspection before drywall goes up and a final inspection after fixtures are installed and tested. Requirements vary by jurisdiction, so confirm the inspection sequence with your local authority.
What happens if an inspection fails. The inspector issues a correction notice listing the defects. Your plumber fixes them and schedules a re-inspection.
Code requirements that affect the plan. Plumbing codes govern pipe sizing, drain slope, vent placement, and the location of cleanouts and shutoff valves. The applicable code is the edition your jurisdiction has adopted, so requirements can differ from one location to the next.
If you are planning a build or remodel, our guide to plumbing installation permit requirements walks through which permits apply and how to obtain them before work begins. Our residential plumbing code requirements guide explains the rules that shape pipe routing and layout as the rough-in is planned.
Watch out: a plumber who offers to skip the permit "to save you time" is transferring the risk to you. Liability for unpermitted work can follow the property, so confirm who holds the permit before work begins.
Rough-In Plumbing: Pipe Routing and Layout Before the Walls Close
Rough-in is the phase where the plumbing skeleton goes in: pipes, fittings, and valves installed inside open walls before drywall goes up. Once the walls close, fixing a routing mistake means opening them again.
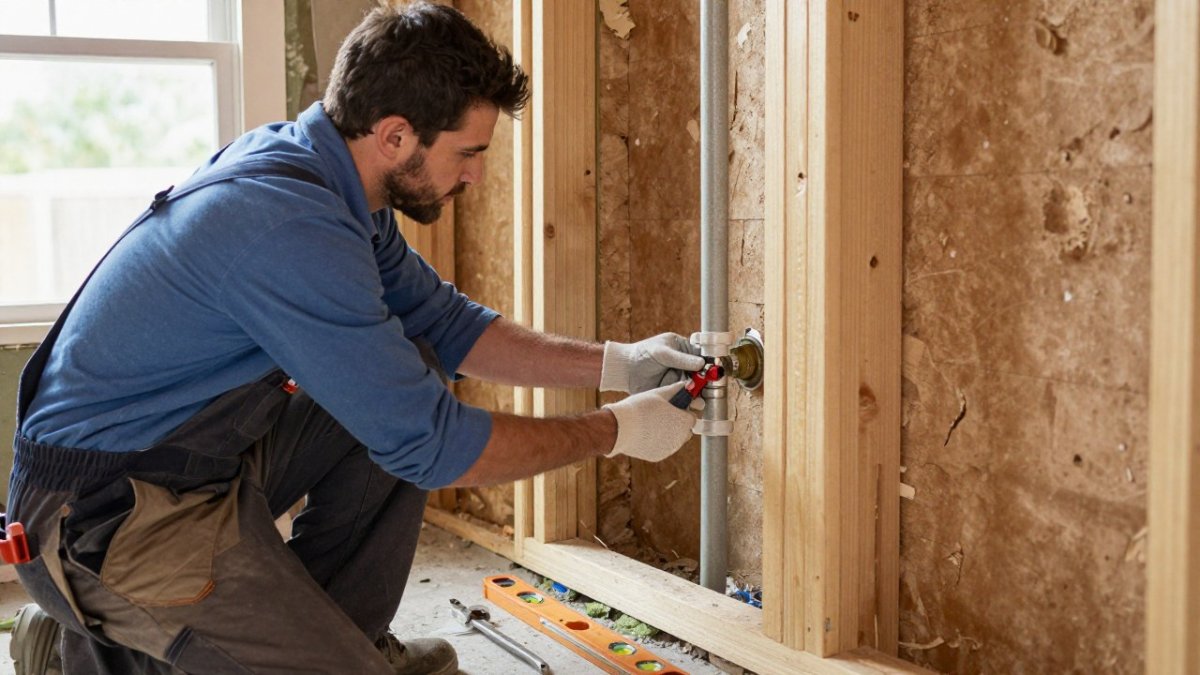
This is where experience shows. Drain lines need consistent slope toward the main stack. Supply lines need room for shutoff valves. Vent pipes need a clear path to the roof.
Water Supply Lines, Drain Lines, and Vent Pipes
Each part of the system does a different job:
- Water supply lines carry pressurized water to fixtures. They run in pairs, hot and cold.
- Drain lines carry wastewater away by gravity. Slope matters more than speed here.
- Vent pipes let air into the system so drains flow without gurgling or siphoning.
Code rules govern pipe sizing, slope, and vent placement. Our residential plumbing code requirements guide explains the rules that shape pipe routing and layout as the rough-in is planned.
Your Rough Plumbing Inspection Checklist
A rough-in inspection happens before walls close, and it's your best chance to catch problems while they're still cheap to fix. Walk the site with your plumber and check these items:
- Pipe routes match the approved plan
- Supply lines are secured with proper hangers
- Drain lines slope correctly toward the stack
- Vent pipes connect and run to the roof
- Shutoff valves are accessible
- No pipes sit inside a stud where a screw could hit them
- Test caps are in place for pressure testing
Watch out: pipes drilled too close to a stud face are a common defect. A drywall screw later nicks the pipe, and the leak shows up weeks after the walls are painted. Our article on common plumbing installation defects covered by warranty lists the failures worth flagging during inspection.
How to Pressure Test New Plumbing
A pressure test proves the supply lines hold. The plumber caps all openings, connects a test gauge to the system, and pressurizes it with water or air. The gauge should hold steady for the test period. A dropping gauge means a leak somewhere in the new work.
What to expect:
- The system is filled and pressurized
- The gauge reading is recorded
- The reading is checked again after the test window
- Any drop triggers a search for the leak, then a retest
You don't need to run this test yourself. You do need to see the result documented before the inspection.
How to Test Plumbing Drain Lines
Drain testing works differently from supply testing because drains aren't pressurized. The plumber fills the drain system with water, then checks every joint for weeping. Some crews use a smoke test to find vent leaks.
Signs a drain test passed:
- Water drains freely at every fixture
- No moisture at joints or fittings
- No gurgling or slow flow
- Vent system pulls air correctly
A failed drain test usually traces to a loose fitting or a slope problem. Both are fixable at rough-in and painful after drywall.
How to Leak Test Shower Plumbing
Shower leaks are the ones homeowners fear most, because the damage hides behind tile. The test happens in stages: the pan is filled and checked for holding, the valve and riser connections are pressurized, and the drain connection is checked for seepage.
What to watch for:
- Water staining at the ceiling below
- A valve that drips after shutoff
- Loose connections at the shower arm
- A pan that won't hold water
If a shower pan fails a leak test, stop. Retiling over a bad pan means doing the whole job twice.
A Realistic Day-by-Day Timeline and Disruption Guide
Most homeowners want one thing from this article: a realistic picture of how long the job takes and how much of their home it takes over.
| Phase | Typical Duration | Disruption You Should Expect |
|---|---|---|
| Walkthrough and planning | 1-2 days | Plumber on site measuring and asking questions; no water shutoff |
| Permit filing and review | A few days to a few weeks | No crew on site; waiting on the jurisdiction |
| Rough-in | 2-4 days | Loud drilling and sawing, drywall dust, open walls, possible water shutoff for part of a day |
| Rough inspection | 1 day | Inspector visit, usually 30-60 minutes; no work until sign-off |
| Fixture installation | 1-3 days | Water shut off for several hours at a time, crew in and out, limited access to the room |
| Final inspection and cleanup | 1 day | Walkthrough, sign-off, debris removal |
Day 1-2: Walkthrough and planning. Expect your plumber to spend time mapping your existing system, checking water pressure and shutoff valves, and confirming fixture locations. You will not lose water access.
Days 3 through permit approval: Waiting. Permit review timelines vary widely by jurisdiction. Some issue over-the-counter permits the same day; others take two to four weeks for a remodel. No crew is in your home during this window, but the schedule is out of your plumber's hands, so build the wait into your expectations rather than assuming the crew is idle by choice.
Rough-in days: The loudest stretch. This is when the plumbing skeleton goes into open walls. Expect drilling, sawing, and drywall dust, and plan for fine dust to travel beyond the work zone.
Rough inspection day: A short pause. The inspector verifies pipe routing, slope, venting, and hanger spacing before walls close. Work stops until sign-off.
Fixture installation days: The water-shutoff phase. Sinks, toilets, tubs, showers, and faucets go in. Expect the water to be off for several hours at a stretch, sometimes more than once. Have a plan for bathroom access and drinking water.
Final inspection and cleanup. The inspector confirms the finished work, and the crew removes debris and walks you through the system. This is also when you should receive documentation, more on that in the completion section.
A homeowner checklist before installation day. A little preparation shortens the disruptive phases:
- Clear the work area and adjacent hallway of furniture, rugs, and wall hangings.
- Move valuables and electronics away from walls that will be opened.
- Confirm fixture locations and finishes in writing before rough-in begins.
- Arrange bathroom and kitchen access for the shutoff days.
- Note where your main water shutoff is and make sure it turns freely.
- Ask your plumber for the daily start and stop times and the expected shutoff windows.
- Keep pets and children out of the work zone during rough-in and fixture days.
Watch out: a schedule that promises fixture installation before the rough inspection passes is a red flag. Walls should not close until the rough-in is signed off, and any crew that skips that sequence is creating a problem you will inherit.
Our guide on how to prepare for a plumbing installation visit covers the room-by-room preparation steps in more detail, and our fixture installation cost guide explains what drives pricing as the project nears completion.
Frequently Asked Questions
How long does a plumbing installation take?
It depends on scope. The duration depends on scope, including whether a single fixture swap or a larger remodel is involved. The schedule also depends on whether walls are already open and whether your contractor has to wait on a rough-in inspection before closing anything up. Ask for a written sequence with inspection dates built in, not just a start date.
What happens during a rough plumbing inspection?
An inspector checks the work before drywall goes up: pipe sizing and slope on drain lines, venting, support and strapping, and the results of your pressure and drainage tests. If something fails, the fix happens while the walls are still open, which is far cheaper than reopening finished surfaces later.
How do plumbers test new plumbing for leaks?
Two tests do most of the work. A pressure test caps the lines and charges the system with air or water, then a gauge reading confirms nothing is escaping over a set period. A drainage test plugs the lines and fills them to check joints for seepage. Shower rough-ins get their own leak test at the drain and valve connections. Ask your plumber to record the gauge readings and show you the results before the walls close.
What should I do to prepare my home for plumbing installation?
Clear access to the work area, empty cabinets under sinks, and move valuables away from walls being opened. Know where your main water shutoff is and confirm the crew knows it too. Plan for water being off for stretches of the day and for dust if walls are being cut. Ask about parking, pets, and daily cleanup expectations, and get the written estimate and schedule in hand before day one so there are no surprises.
Typical duration of each plumbing installation phase